Introduction
This document explains how to implement Single Sign-On (SSO) between Azure Active Directory (Azure AD) and Salesforce, where:
- Azure AD acts as the Identity Provider (IdP)
- Salesforce acts as the Service Provider (SP)
The goal is to enable users to log in to Salesforce using their Azure AD credentials, improving security and user experience.
Key Concepts
What is Azure Active Directory?
Azure Active Directory (Azure AD) is Microsoft’s cloud-based identity and access management service.
It helps organizations authenticate and authorize users to access resources such as Microsoft 365, Azure services, and third-party SaaS applications (like Salesforce).
What is an Identity Provider (IdP)?
A n Identity Provider is a system that:
- Authenticates users (verifies their credentials)
- Issues authentication tokens or assertions to other systems
In this integration, Azure AD is the Identity Provider because it manages user identities and authentication.
What is a Service Provider (SP)?
A Service Provider is a system or application that relies on the IdP to authenticate users.
In this case, Salesforce is the Service Provider, allowing Azure AD to verify users and provide access without requiring Salesforce passwords.
Prerequisites
Before implementing:
- Admin access to Salesforce Setup
- Admin access to Azure AD Portal
- A custom domain (My Domain) deployed in Salesforce
- User accounts present in both Azure AD and Salesforce (email addresses must match or whatever common field between SF and azure (like email, employeeid etc))
Implementation Steps
Configure Azure AD (Identity Provider)
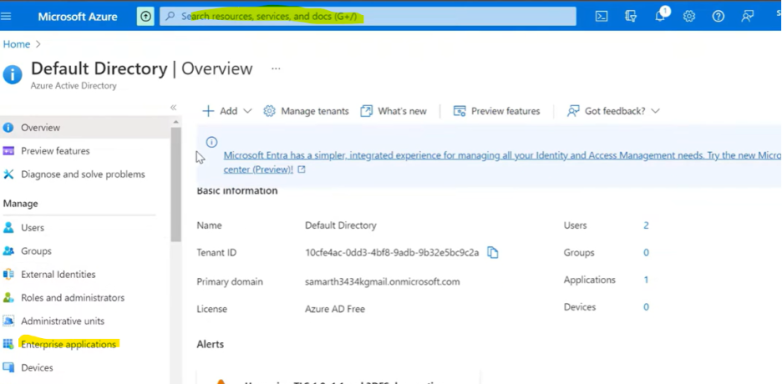
- Sign in to Azure Portal (portal.azure.com)→ Azure Active Directory → Enterprise Applications. We can directly search on search bar for enterprise application
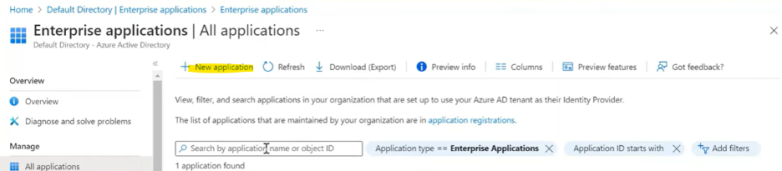
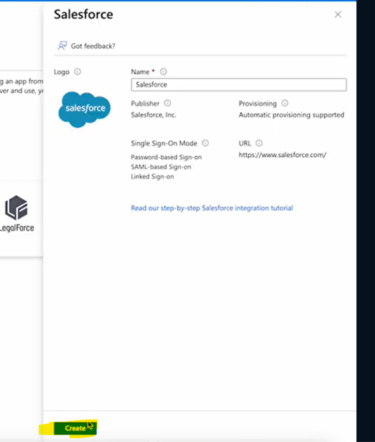
- Click New Application → In search box search for “salesforce”. Click on Salesforce. Popup will come and click on create.
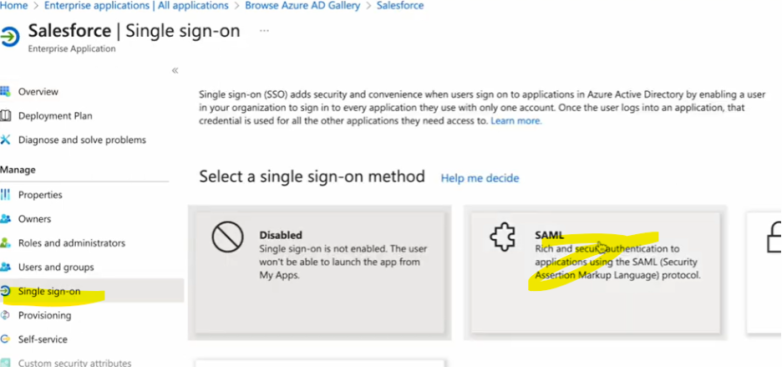
3. Open the app, click on Single Sign-on on the left panel, click on SAML, and configure the app.
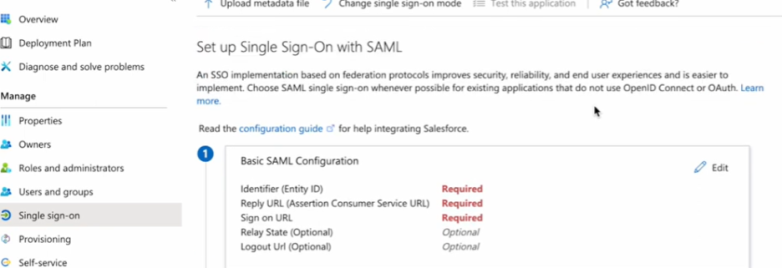
a. Set up the Basic configuration. In the Identifier, Reply URL, and Sign-In URL, enter your Salesforce Domain.
(It can be obtained from Setup → My Domain in Salesforce)
- Identifier (Entity ID): https://<yourDomain>.my.salesforce.com
- Reply URL (ACS URL)
- Sign on URL
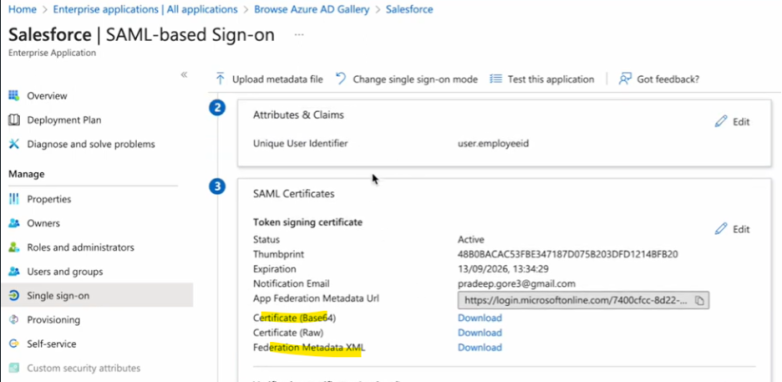
b. Attributes and Claims
This is the common identifier between SF and AZURE. We use federation Id field on user in SF

c. Download the certificate and federation metadata XML. This can be later used in setting up SSO configuration in Salesforce
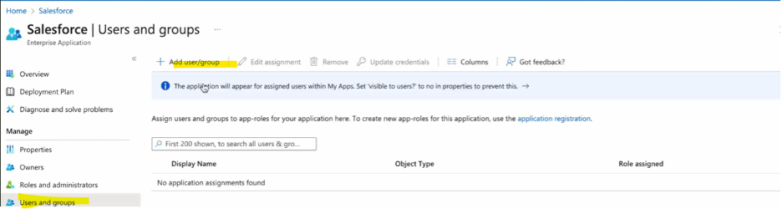
4. Add users to the application. Select the user and role for the user
Configure Salesforce (Service Provider)
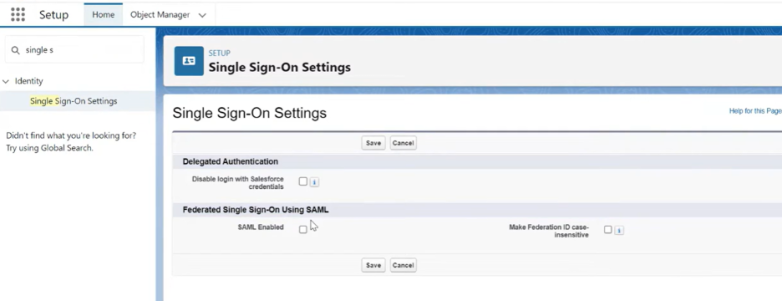
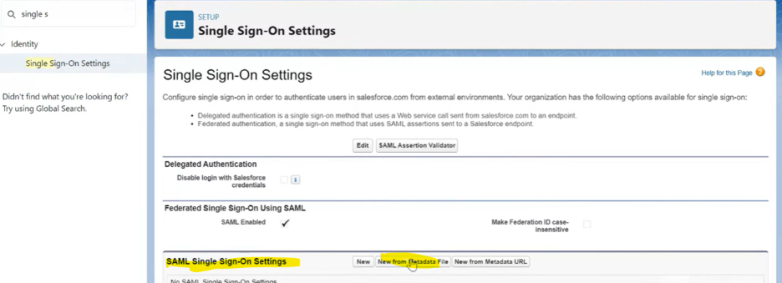
- Log in to Salesforce → Setup → Identity → Single Sign-On Settings. Enable SAML.
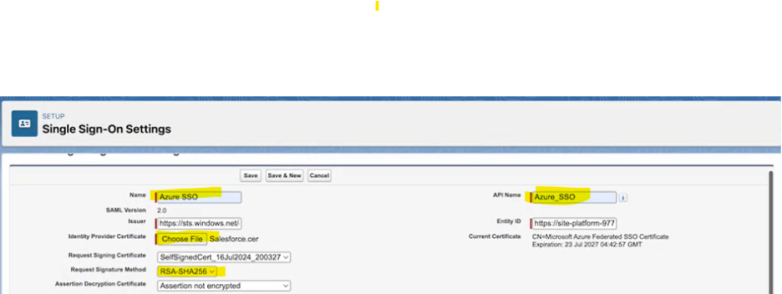
2. Set up single sign-on settings using the downloaded metadata file from Azure in the previous steps
Give meaningful name. Add a downloaded certificate to the identity provider. Ensure RSA-SHA 256 is sleeted in request signature method
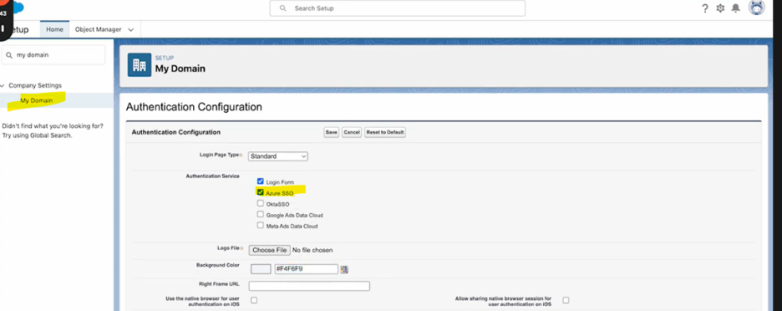
3. Set up the authentication configuration in my domain and select the SSO created before
4. Populate the federation ID in the Salesforce user same as the attribute
Test the SSO Connection
- In Azure AD → Salesforce Application → Test Single Sign-On.
- Or directly access Salesforce via: domain URL
Advantages of Implementing SSO
- Enhanced Security:
Centralized authentication through Azure AD reduces password fatigue and risk of compromised credentials. - Seamless User Experience:
Users can access Salesforce with their Microsoft 365/Azure AD credentials without logging in separately. - Improved Compliance:
Enables audit trails, conditional access, and multi-factor authentication (MFA) through Azure AD. - Reduced IT Overhead:
Fewer passwords reset requests and simplified access control management.